
Defining the Simulation Environment
In order to operate our application from within the redBlocks Simulator, we need to start the redBlocks Simulator and configure a simulator project there. The redBlocks Simulator starts with a blank project that is already configured to cooperate with a simulation target that connects to port 10000 (the port number can be changed via menu "Project -> Configure Project").
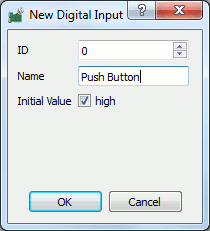
First we want to define two hardware interfaces: a PushButton input and an Led output. This is accomplished by selecting "Project -> Configure Interfaces" from the program menu. When hitting the +-Button on the tab "Digital inputs", a dialog appears via which we can add the desired input. We choose to specify the value 0 for the "ID" (which is later used to identify the simulated digital input from within the simulation low-level platform) and an arbitrary name, e. g. Push Button. For the initial value we need to check the box "high". This corresponds to a digital input with a pull up resistor.
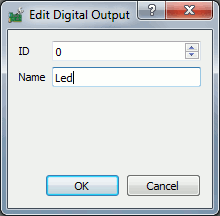
For the Led we need to hit the +-Button on the tab "Digital outputs". In the corresponding dialog we also need to specify an arbitrary name and for instance "ID" 0.
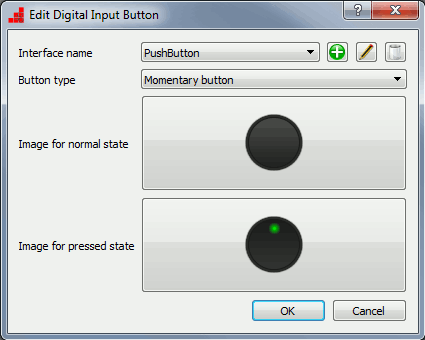
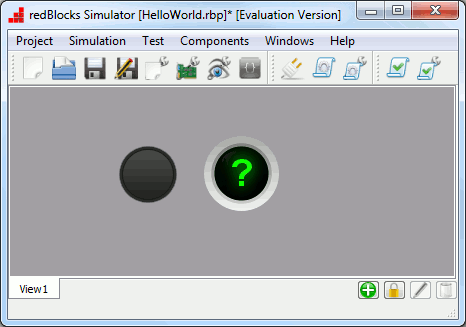
Next we define the controls for our digital input and output. Select the menu element "Components-> Add View Component -> Digital Output -> Icon". Choose the Digital Output "Led", change the images, if you like or just use the proposed ones.
![]()
After having closed the dialog with "OK", the new control can be moved to the desired position by keeping the left mouse button pressed and dragging it.
Do the same for the Push Button (Components -> Add View Component -> Digital Input -> Button). Choose Momentary Button as "Type of the input".
Your screen should look something like this now:
With this configuration in place, the hardware abstraction layer definitions can later be generated from within the simulator in order to insert them in the code of our example project.