

Each project that is created from within the redBlocks Workbench is already prepared to be integrated with the Keil uVision Simulator for ARM targets. The automatically generated files are located in the directory ProjectName/project/sim/host/uVision.
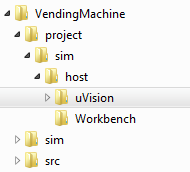
Open the Keil uVision project file (in our example VendingMachine.uvprojx) that is located in folder "uVision". If the Keil uVision IDE is correctly installed on your computer you can just double-click on this project file from within the redBlocks Workbench in order to open it in the Keil uVision IDE.
If you are not interested in further details at this point and just want to get the VendingMachine example up and running within the Keil uVision IDE, you can directly proceed with the next step.
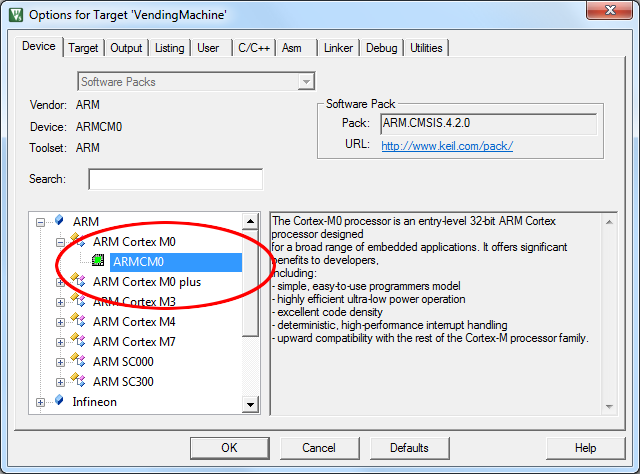
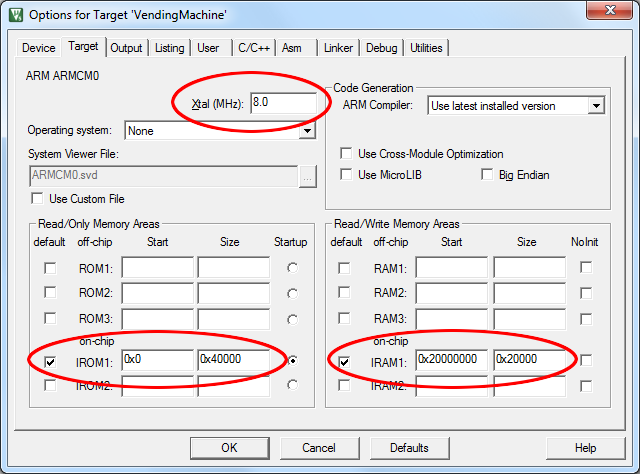
The project is preconfigured with a generic ARM Cortex M0 target. Via the Keil uVision Target Options, you can for instance choose a different target processor, change the memory range for RAM and Flash and specify the simulated processor speed.
The project is already set up to run in the Keil uVision Simulator and limit the simulated processor speed to real time. The setup also defines a virtual memory region on the target that is used by the redBlocks SiL simulation environment for data exchange with the redBlocks Simulator.
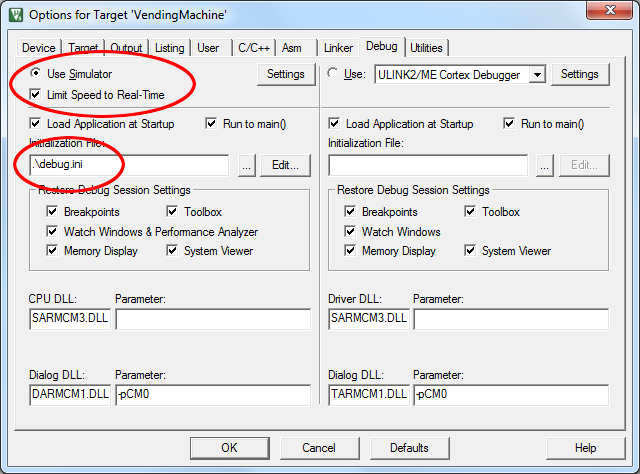
This virtual memory region is defined in debug.ini. Its address range only needs to be changed, if the pre-configured range overlaps with the simulated target's memory. The address of this virtual memory region must be identical to the property Address (hex) of the Target Connection setting within the redBlocks Simulator (see here)
The main routine within main.cpp contains the application’s startup sequence that is needed for simulation environment setup.
These are the relevant parts:
- The environment is pre-configured for a generic ARM Cortex M0 processor.
// When changing the device in the project settings, adjust the following include accordingly and
// set the heap and stack size in the startup file to reasonable values (as this project includes
// a redBlocks heap manager, which maintains its memory in the global data section, the heap size
// in the startup file can be set to 0).
#include <ARMCM0.h>
When a different target processor is selected via the Keil uVision Target Options, the preconfigured include file ARMCM0.h needs to be replaced with the corresponding target device’s include file(s). You may also need to change the stack and heap memory size (in the file startup_xxx.s).
- The pre-configured environment includes a system tick driver that can be used for all ARM Cortex M targets.
typedef redBlocks::HAL::Drivers::CortexMSystemTickDriver SystemTickDriver;
RB_CONNECT_ISR_CBK( SystemTickDriver, SystemTickDriver::CBK_ON_SYSTEM_TICK, redBlocks::Simulators::SimulationClient::tick() );

static const u32 SYSTEM_TICKS_PER_SEC = 100;

extern "C"
{
  void SysTick_Handler( void )
  {
    SystemTickDriver::onIsr();
  }
}
For different targets, a suitable driver needs to be included and used.
- The simulation environment for the Keil uVision IDE is defined with the following code fragments:
typedef redBlocks::Simulators::UVisionClientTargetConnection TargetConnectionType;

// For correct timing, you need to make sure this value corresponds to the setting
// "Xtal (MHz)" in the Keil uVision target option settings (e. g. 8.0 MHz => 8000000)
SystemCoreClock = 8000000;

TargetConnectionType simulatorConnection( 0x30000000 );
simulatorConnection.connect();

// Setup the simulation client environment.
redBlocks::Simulators::TSystemTickSimulationClientEnvironment<SystemTickDriver> simClientEnv;

// Enable system tick.
SystemTickDriver::configure( SYSTEM_TICKS_PER_SEC );
SystemTickDriver::enableCallback();

// Initialize the simulation client.
// The system tick needs to be enabled before entering this method, otherwise this method will never return.
redBlocks::Simulators::SimulationClient simulationClient( simulatorConnection, simClientEnv );
There is rarely a reason to change these code snippets.
- The rest of the setup sequence is identical to the application setup that is also needed for the real target, e. g. initialization of HeapManager, ComChannelLogger, LowLevelPlatform, HighLevelPlatform and the application specific class(es).